Sinisakrisan (Talk | contribs) (→Overview) |
(→After Uploading) |
||
| (13 intermediate revisions by 3 users not shown) | |||
| Line 1: | Line 1: | ||
===Overview=== | ===Overview=== | ||
| − | To upload photos, | + | To upload photos, the user will first have to [[Setting Up Photo Galleries |enable]] Photo Galleries and have at least one [[Creating Albums|album created]]. If sharing images from [[Share Box|Share Box]], the [[Default user Album|default user album]] is automatically created. |
| − | + | ||
| − | ===Starting the Photo | + | ===Starting the Photo Upload=== |
| − | + | ||
| − | + | On an already-created album page, click '''Upload Photos''':<br/> | |
| − | + | ::: [[File:edit-album.jpeg ]]<br/><br/> | |
| − | + | The popup screen will appear, giving you the following '''Options''':<br/> | |
| − | + | ::: [[File:upload-photos.jpeg ]]<br/><br/> | |
| − | + | ||
| − | + | # '''Album Name''' followed by the dropdown box of available photo albums that the user has already created. The user can also create the new album from this popup, too. | |
| + | # '''Add Files''' - Clicking this button will initiate the upload process. | ||
| − | |||
| − | After | + | After the upload has completed, the popup will remain open, waiting for the next action. The user can either close it and view the album (the page will auto-refresh), or the user can add more photos. |
| + | |||
| + | ===After Uploading=== | ||
| + | |||
| + | When the popup window for the upload has closed, the page is automatically refreshed, and the page should look similar to the one shown below:<br/> | ||
| + | |||
| + | ::: [[File:edit-pics.jpeg]] | ||
Latest revision as of 04:02, 2 July 2018
Overview
To upload photos, the user will first have to enable Photo Galleries and have at least one album created. If sharing images from Share Box, the default user album is automatically created.
Starting the Photo Upload
On an already-created album page, click Upload Photos:
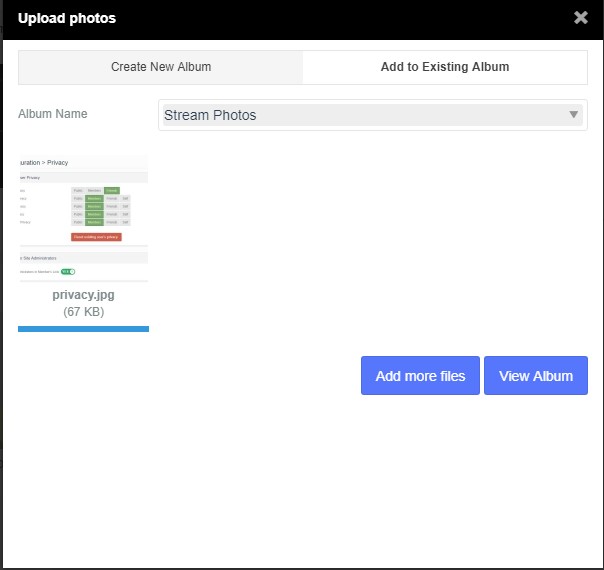
The popup screen will appear, giving you the following Options:
- Album Name followed by the dropdown box of available photo albums that the user has already created. The user can also create the new album from this popup, too.
- Add Files - Clicking this button will initiate the upload process.
After the upload has completed, the popup will remain open, waiting for the next action. The user can either close it and view the album (the page will auto-refresh), or the user can add more photos.
After Uploading
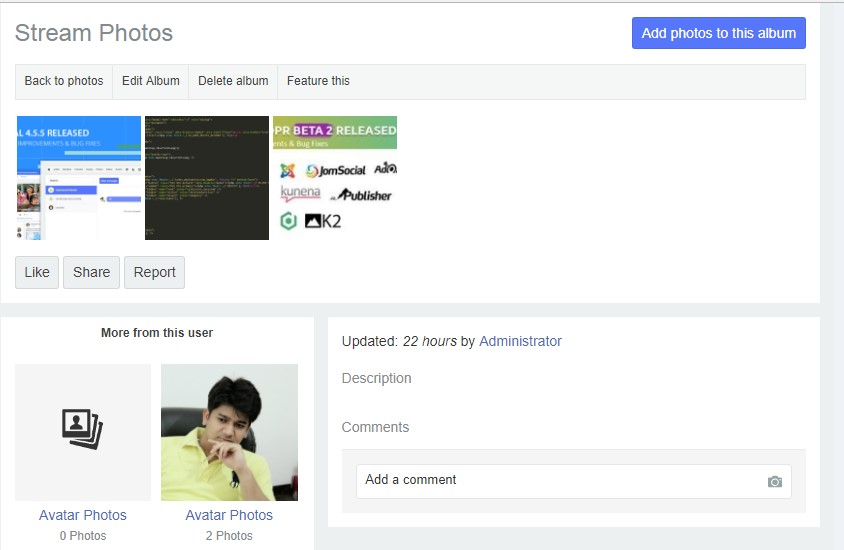
When the popup window for the upload has closed, the page is automatically refreshed, and the page should look similar to the one shown below:


