(→Creating a Profile from the Frontend) |
(→Populating the Joomla User Information) |
||
| Line 17: | Line 17: | ||
[[File:Getconnected-arrow.png]] | [[File:Getconnected-arrow.png]] | ||
| − | === | + | ===Inputting the Joomla User Information=== |
| − | The very first screen of the JomSocial registration flow | + | The very first screen of the JomSocial registration flow is actually handled by Joomla. This might sound strange because the registration occurs through the JomSocial form; please read [[Explaining User Profile|this article]] to understand this process. You will need to fill in all the fields on this screen in order to proceed further.<br/> |
| − | [[File:Register.png]] | + | [[File:Register.png]]<br/><br/> |
| − | All information needs to be provided. If some of the information is not provided, | + | All of the information needs to be provided. If some of the information is not provided, JomSocial will notify users that errors must be corrected before proceeding.<br /> |
| − | Click | + | Click '''Next''' to proceed |
| − | {{alert|<strong> | + | {{alert|<strong>Note:</strong> Be aware that Joomla User Object is still not created. It is only created after the registration flow has been completed.|alert-danger}} |
| − | ==== | + | ====ReCaptcha==== |
| − | If you [[Enabling ReCaptcha|configured ReCaptcha]] in | + | If you [[Enabling ReCaptcha|configured ReCaptcha]] in the JomSocial configuration, it will show up on this screen. Many people will give good arguments for using ReCaptcha to prevent spambots to register on the site; however, if the JomSocial registration flow is the [[JomSocialRedirect|only way for users to register on the site]] and you use [[Custom Profile Fields]] as outlined in the following section of this tutorial, you will most likely do just fine without ReCaptcha as there is no way for spambots to guess all of the custom profile fields you set, especially if you use a combination of dropdowns, checkboxes, multiple selects, etc.. |
===Populating the Custom Profile Fields=== | ===Populating the Custom Profile Fields=== | ||
Revision as of 07:12, 8 March 2013
Contents
Before You Begin
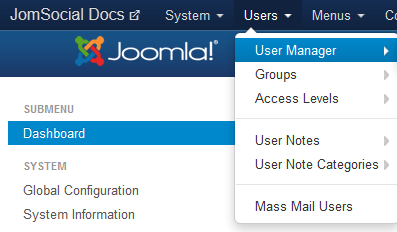
Before a user can create a profile, you need to make sure that the Joomla User Registration is enabled. Navigate to the site Backend and from Users dropdown menu, open User Manager.
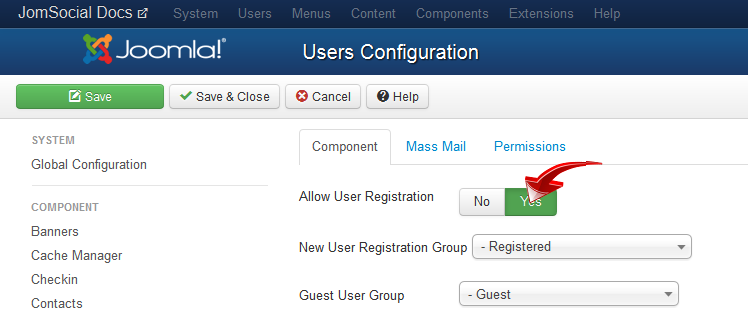
Click Options and make sure that Users Registration is enabled.
Another interesting option on this screen is New User Account Activation. For our example, we will set this to None and allow the user to login instantly after registration.
If you wish your user to verify their email before they can login, you will want to set this option to Self, or if you want to approve every new registration, the Admin option would be right choice.
Creating a Profile from the Frontend
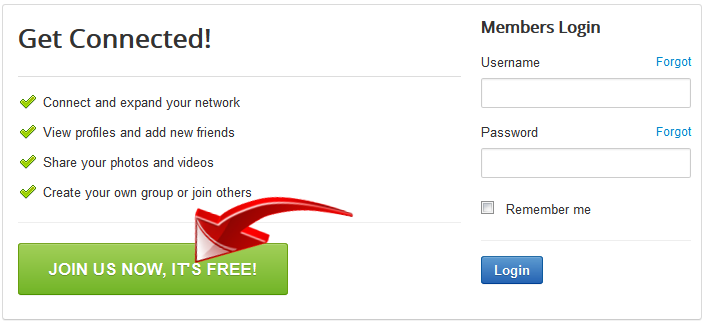
Navigate to the JomSocial Frontpage and click the green Join Us Now, Its Free! button.
Inputting the Joomla User Information
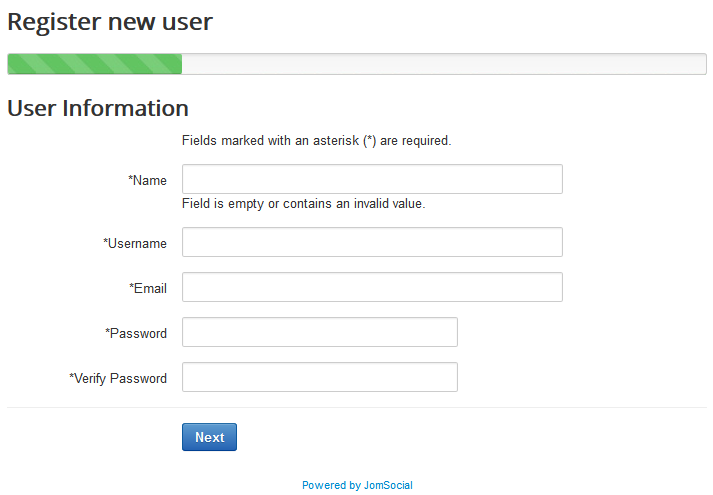
The very first screen of the JomSocial registration flow is actually handled by Joomla. This might sound strange because the registration occurs through the JomSocial form; please read this article to understand this process. You will need to fill in all the fields on this screen in order to proceed further.
All of the information needs to be provided. If some of the information is not provided, JomSocial will notify users that errors must be corrected before proceeding.
Click Next to proceed
ReCaptcha
If you configured ReCaptcha in the JomSocial configuration, it will show up on this screen. Many people will give good arguments for using ReCaptcha to prevent spambots to register on the site; however, if the JomSocial registration flow is the only way for users to register on the site and you use Custom Profile Fields as outlined in the following section of this tutorial, you will most likely do just fine without ReCaptcha as there is no way for spambots to guess all of the custom profile fields you set, especially if you use a combination of dropdowns, checkboxes, multiple selects, etc..
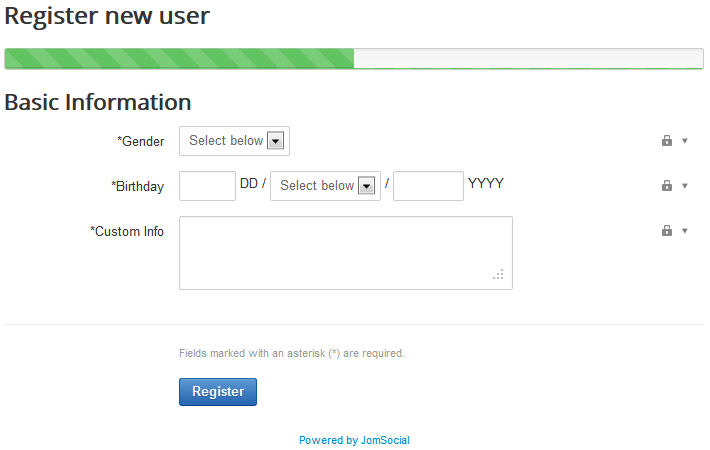
Populating the Custom Profile Fields
This is the step of registration where actual jomSocial User Profile is created. The fields on this screen may vary, depending on the Custom Profile Fields you have set for the site
Provide required information and click on the Register button
Uploading Avatar
This is the last step of jomSocial registration flow. Avatar upload is not mandatory and you can either skip it or click next
Finishing up
Depending on the type of New User Account Activation we set at the very begining of this tutorial, the last screen will vary, but in our case, it will present this screen
Click on Back to home or login to site.
Your Profile is created.

