(→Creating Groups from the Frontend) |
(→Continuing Group Creation) |
||
| Line 43: | Line 43: | ||
After selecting all of your options, click '''Create Group'''. If all required fields have been completed properly, the group will be created and this window will appear:<br/> | After selecting all of your options, click '''Create Group'''. If all required fields have been completed properly, the group will be created and this window will appear:<br/> | ||
| − | [[File:Creategroups2.png]]<br/><br/> | + | ::: [[File:Creategroups2.png]]<br/><br/> |
Here, you can change the avatar for your group, post a new announcement, create the first group discussion, edit group details again, or simply, go to the Group Page. | Here, you can change the avatar for your group, post a new announcement, create the first group discussion, edit group details again, or simply, go to the Group Page. | ||
==Creating Groups from Back End== | ==Creating Groups from Back End== | ||
Revision as of 00:24, 9 March 2013
Contents
Before You Begin
Please make sure that you have enabled group before proceeding.
Creating Groups from the Frontend
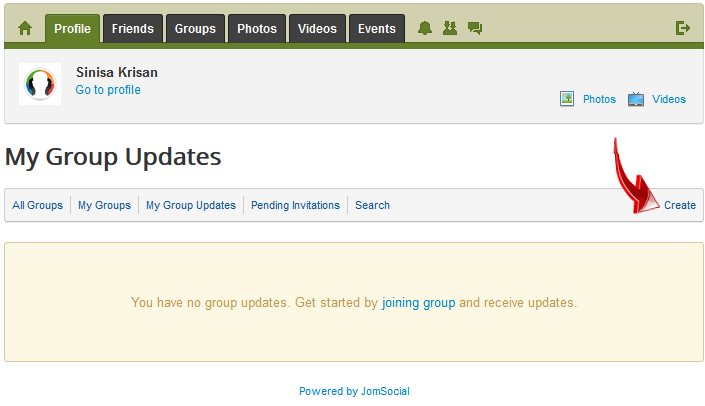
Go to the Groups Page on your site and click Create.
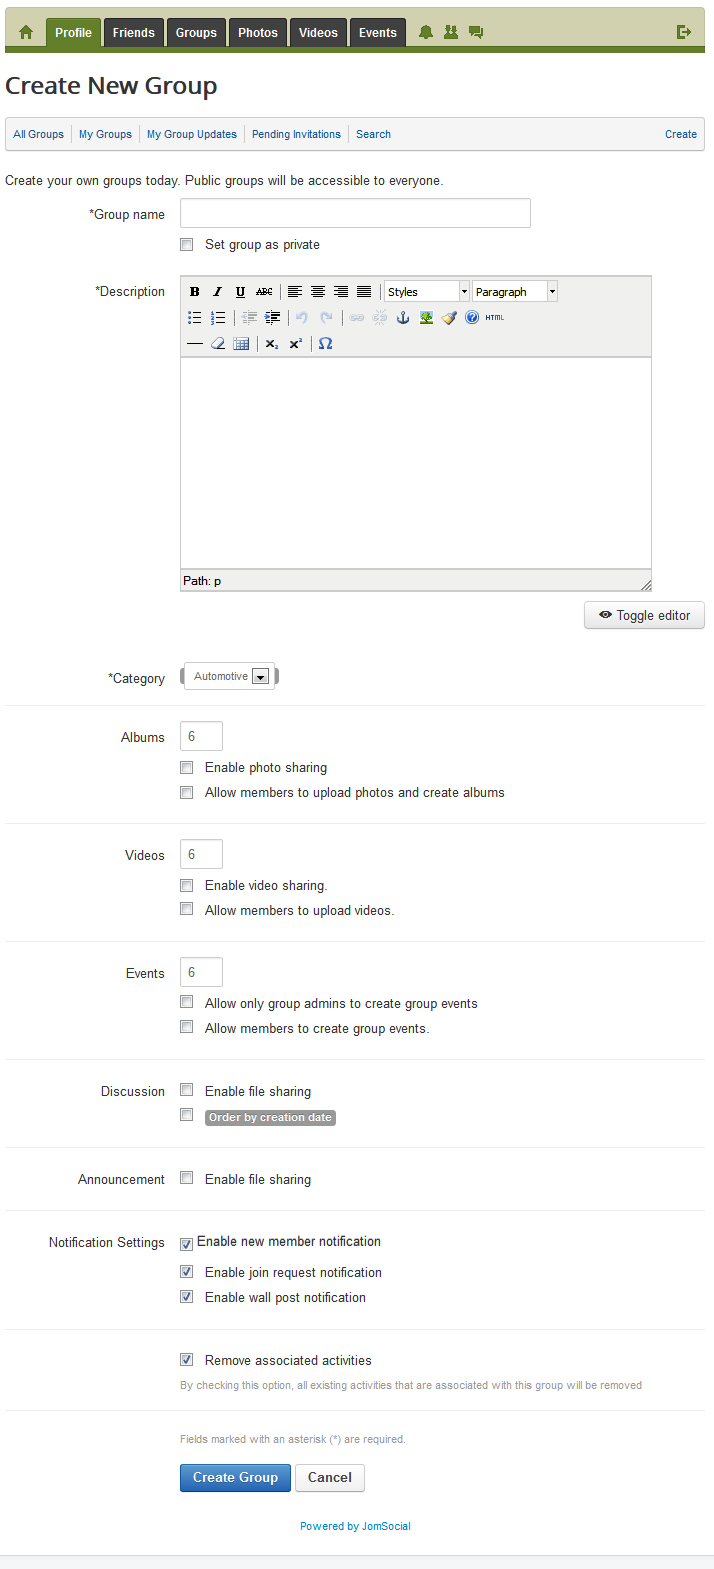
The Create New Group form will appear:
Group Creation Page Options
- Group name - This field is mandatory and will be used as the name of the Group. The name MUST be unique. If a group with the same name already exists, JomSocial will flag an error. ('Error: Group name has been taken. Please select a different name.')
- Set group as private - This will set Group as private. Users will have to be approved by the Group Admin before they can join.
- Description - Describes the group. Note: Even if set to private, this description will be visible to all users.
- Category - Select the Category to which this Group will be added.
- Albums - Number of photo albums to show on main Group Page (this setting will not show up if Group Albums is disabled in the Backend).
- Enable photo sharing - Enable photo uploads for this specific Group.
- Allow members to upload photos and create albums - If this option is enabled, all members will have the ability to create albums and upload photos.
- Videos - Number of videos to show in main Group Page (this setting will not show up if Group Videos is disabled in the Backend).
- Enable video sharing - Enable Video uploads for this specific Group.
- Allow members to upload videos - If this option is enabled, all members will have ability to upload videos.
- Events - Number of Events to show on main Group Page (this setting will not appear if Events are disabled in the Backend).
- Allow only group admins to create group events - Same as Enable group events. This MUST be checked if you want to allow Events Creation in this specific Group.
- Allow members to create group events - If this option is enabled, all members will have ability to create Events in Groups.
- Discussion
- Enable file sharing - allow file sharing in Discussions for this Group (This option will not appear if File Sharing is disabled in the Group Settings in the Backend)
- Order by creation date - Set the Discussions ordering on main Group Page.
- Announcement
- Enable file sharing - allow file sharing in Announcements for this Group (This option will not appear if File Sharing is disabled in the Group Settings in the Backend).
- Notification Settings
- Enable new member notification - Notify Group Admins when new members join.
- Enable join request notification - Notify Group Admins about new Join Request (Private Groups only).
- Enable wall post notification - Send email notifications to Group Members whenever there is a new post on the wall (Please read about Walls here]
- Remove associated activities - By checking this option, all existing activities associated with this group will be removed.
Continuing Group Creation
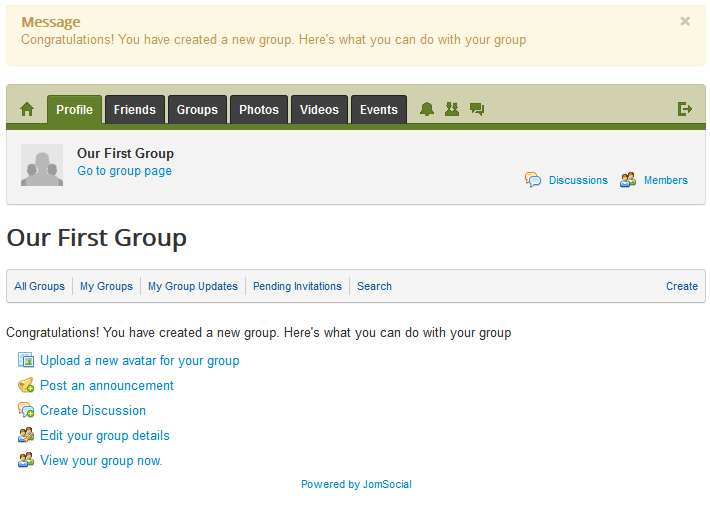
After selecting all of your options, click Create Group. If all required fields have been completed properly, the group will be created and this window will appear:
Here, you can change the avatar for your group, post a new announcement, create the first group discussion, edit group details again, or simply, go to the Group Page.


